Recycled Sweater Pumpkin
This sweater was my very favorite slouchy cotton sweater.
It had so many pulls this year I just couldn't wear it one more time so I'm going to recycle it.
This easy project can be made with a sweater you are sad to part with or one from the thrift store.
Follow along and see just how easy it is to create a beautiful sweater pumpkin for Fall! ...
Like I said, this was my favorite sweater and I had no right wearing it for this long because there were more pulls than stitches at this point.
Be sure to visit the bold blue links in this post for the products I use and more information about related posts. Also, the READ MORE section will take you to even more DIY projects!
I began like I did with other recycled clothing pumpkins I've made in the past, by cutting off part of the sweater sleeve.
There are several ways to make a pumpkin and I'm going to show you two ways that worked for me.
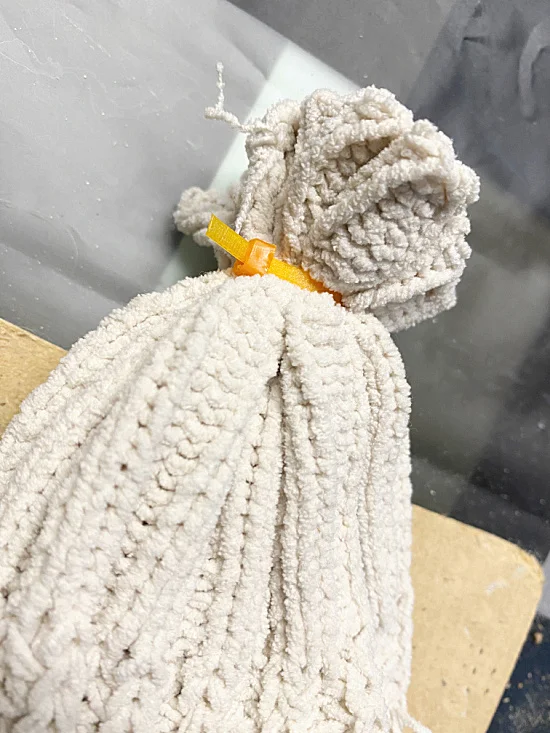
On the first one I turned the sleeve inside out and tied one end tightly with a zip tie. I worked carefully so the sweater wouldn't unravel.
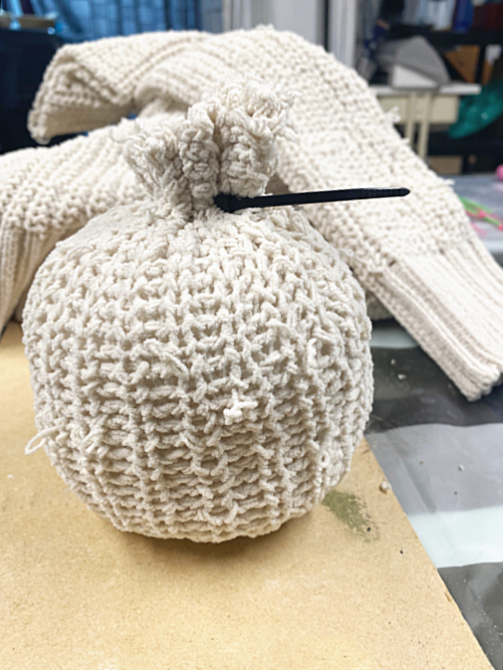
I sat the sleeve up so I could easily see how much pillow stuffing I would need.
If you have an old bed pillow you can wash it and save the stuffing for projects! 😉
I filled the pumpkin then used another zip tie to grab the fabric at the top.
Next, I used jute twine to wrap the sweater fabric that was at the top to create a stem.
I gathered 3 lengths of jute twine about 24" long and tied them in the center.
I hot glued the center tie to the bottom of my pumpkin.
Two by two I pulled the opposing jute strings up to the top of the pumpkin, tied them around the stem, then cut the excess string.
I did this with all 6 strings intertwining them with each other so they met evenly at the top.
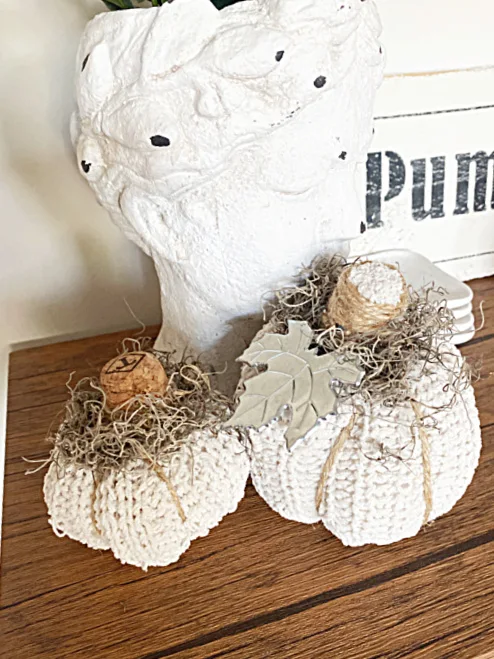
Don't worry if the top looks a little messy at this point. I used Spanish moss to cover the area around the stem.
I had a silver leaf left over from a dollar store project and glued it to the top of my pumpkin.
The second way to create the pumpkin is to once again zip tie the bottom of the pumpkin when the sleeve is inside out.
This time, once I stuffed my pumpkin, I used a longer zip tie to "sew" around the top of the sleeve, gathering the stitches.
Before I pulled the zip tie too tightly I added a little hot glue and a champagne cork to the center.
I decorated the top of this pumpkin with Spanish moss as well.
READ MORE: SWEATER PROJECTS
I went around each pumpkin cutting off any of the pulls in the fabric. Don't worry it didn't compromise the stitches!
They are the cutest little pumpkins and I'm so happy I get to enjoy my favorite sweater every Fall!
Please Pin --->>
READ MORE: DIY FALL PROJECTS
Thank you so much for visiting and before you go please sign up for the Homeroad emails in the pop-up so my next DIY will go out straight to you!


