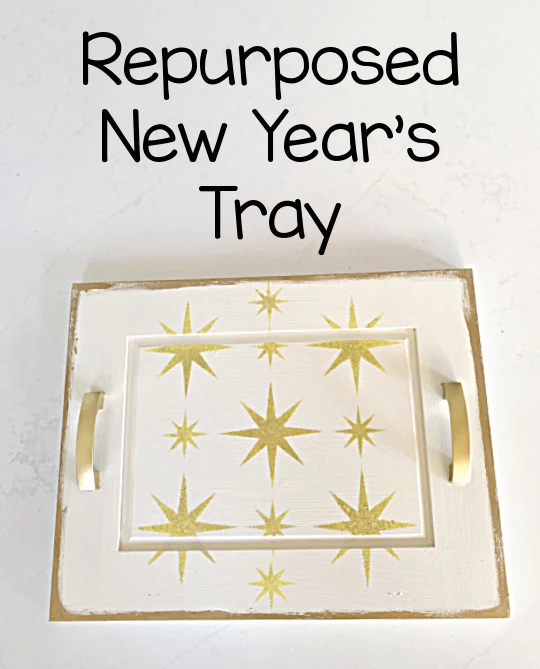
Repurposed New Year's Eve Tray
Now that the Christmas holidays are a wrap it's time to start thinking about the New Year!
2023 ready or not, here we come!
Today I'm creating a jazzy little project from a repurposed cabinet door for my New Year's Eve party.
No party? That's OK, this project is perfect for a small gathering too!
Take a look...
I began with an old cabinet door sample. I had about 100 and I'm down to my last few.
Why buy new when you can repurpose something you have into something new. Maybe you have an old tray you can repaint and stencil like this one...
While you're reading through this post please visit the bold blue links for the products I used and links to related Homeroad projects. The READ NOW section will take you to bonus projects too!
The first thing I did was to paint it white. I'm using my favorite Fusion Mineral Paint color called Raw Silk. I honestly use it on most things I don't want to be pure white.
After 2 coats and a little drying between coats, I was ready to stencil. If you've never used a heat gun to dry between coats, it works great and is pretty quick!
I'm using this great star stencil from Old Sign Stencils called Retro Star that I've already used a bunch of times as you can see by my colorful stencil. I actually never clean my stencils and Old Sign Stencils are so thick and wonderful that I've never had a problem using it multiple times without cleaning it each time.
READ MORE: STENCILED PROJECTS
First I stenciled with a very light yellow craft paint. When that dried I stenciled over the top with a few coats of a gold glittery paint.
While my stencil was drying I grabbed a couple of drawer pulls I had from another project and spray painted them a bright gold color. This is the prettiest gold spray paint I've found yet.
When the handles were dry I attached them with screws through the back to the cabinet door that was instantly now a tray!
You may want to use some kind of feet or rubber dots on the back of the tray to keep it from slipping.
My last step was to use a little Rub and Buff Gold Leaf color to roughly accent the edges of my tray. It just gave it a little extra sparkle!
Please pin -->>
That's it! My tray is ready to party!
When I say party I'm pretty much talking about a tiny gathering of daughters and my husband. We don't go too crazy!
The blingy tray is the perfect thing to serve drinks, use for a charcuterie board (with wax paper over the paint), or just for a fun and festive centerpiece.
It is always nice to have a few little festive accessories for the holidays even if you're not entertaining a crowd.
I think my family just expects the little extras! ⭐
READ MORE: NEW YEAR PROJECTS
Thanks so much for visiting and before you go please sign up for the Homeroad emails so my next DIY tutorial will go out straight to you!
Check out the video of a New Year special I did for News 4 New York a whole bunch of years ago now!


